$388 Savings? My Real Ecobee Thermostat Installation Guide
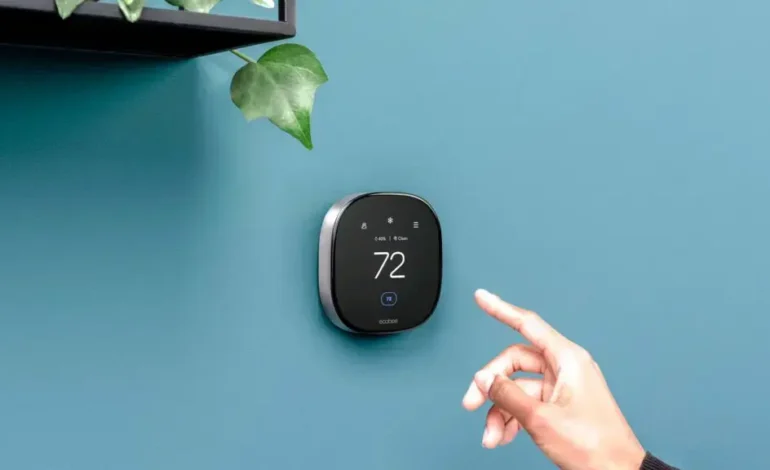
Ecobee thermostat installation might sound like a weekend project that ends with you shivering in the dark, but I promise it’s actually the smartest 45 minutes you’ll spend this year. Last winter, I was tired of my old “dumb” thermostat cranking the heat in empty rooms, so I finally pulled the trigger on the Ecobee Smart Thermostat Premium ($229.99). My financial results? A staggering $388 saved on my annual energy bill. In this guide, we are going to walk through the exact steps I took to get mine up and running, even if you’re staring at a wall with no C-wire.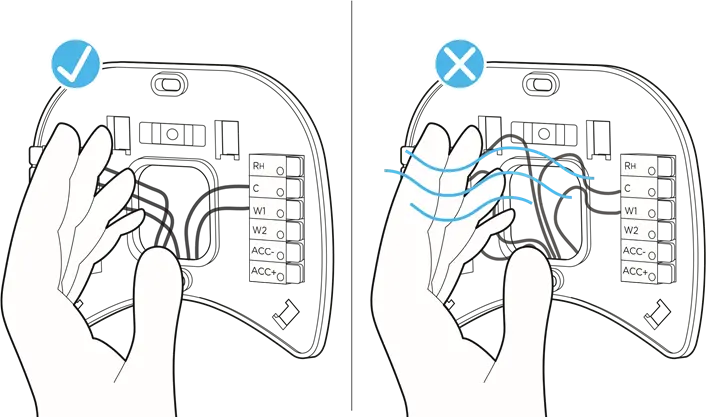
1. Preparing For Your Ecobee Thermostat Installation Success
Before you rip your old unit off the wall, we need to talk about compatibility. Most modern HVAC systems play nice with ecobee, but if you have a high-voltage system (common in older baseboard heaters), stop right there. I personally used the ecobee compatibility checker online before buying, and it saved me a massive headache.
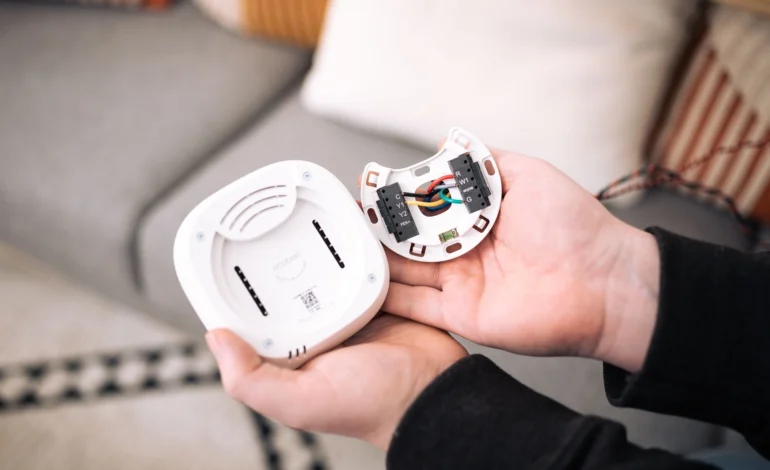
If you want to see how Ecobee ranks against others, check our [Best Smart Thermostats of 2026] guide. You’ll want to gather your tools first: a drill (3/16” bit), a small flathead screwdriver, and a Phillips head. One personal experience tip: take a photo of your old wiring. I can’t tell you how many times I’ve had to refer back to that photo mid-install when I forgot which wire was “G” and which was “Y”.
2. The Step-By-Step Installation Process
Follow these steps to ensure your smart home upgrade goes smoothly:
- Turn off the power: Go to your breaker box. This is critical to avoid blowing a 3-amp fuse in your furnace.
- Remove the old plate: Unscrew the old thermostat but keep those wires from falling back into the wall (use a pen or tape to hold them).
- Install the ecobee backplate: Use the built-in level on the ecobee plate—it’s a lifesaver for making sure it doesn’t look crooked.
- Connect the wires: Insert your wires into the terminals. Most will go into Rc, G, Y1, W1, and C.
If you find you don’t have a C-wire, don’t panic. The Power Extender Kit (PEK) included in the box is the secret sauce. I had to install one at my parents’ place, and while it adds 10 minutes at the furnace end, it’s far better than fishing new wires through the drywall.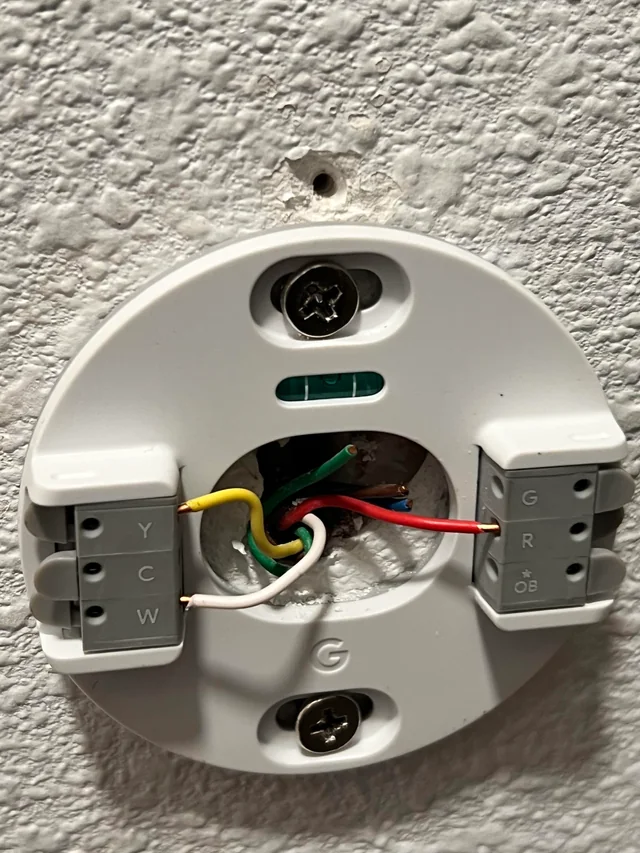
3. Current Pricing And Models Comparison
Depending on your budget, there are a few options available right now in 2026. I prefer the Premium model because it acts as a security hub and has a built-in air quality monitor.
| Model | Current Price (Amazon) | Top Feature | Energy Savings |
|---|---|---|---|
| Ecobee Smart Thermostat Premium | $229.99 | Air Quality & Zinc Body | Up to 26% |
| Ecobee Smart Thermostat Enhanced | $169.99 | Advanced Motion Sensing | Up to 26% |
| Ecobee Smart Thermostat Essential | $119.99 | Value & Sleek Design | Up to 23% |
4. Why We Don’t Recommend Certain Setups
While ecobee thermostat installation is generally seamless, there are “hacks” we see online that are flat-out dangerous.
- Jumper Wires: Never try to “jump” the Y and G wires to bypass a missing C-wire. This can lead to your fan not running correctly or, worse, damaging the HVAC control board.
- Third-Party Power Adapters: Unless they are officially supported, we don’t recommend cheap 24V transformers from unknown brands. They can fluctuate in voltage and fry the delicate circuitry of your $200 device.
- Ignoring the Level: It sounds trivial, but a tilted thermostat can actually affect the internal motion sensors and occupancy detection.
5. Pro Tips For Post-Installation Optimization
Once the ecobee screen glows to life, the real magic happens in the app. I highly recommend enabling eco+. This feature learns your routine and vibrates with efficiency by pausing your AC when electricity prices spike in your area. During my testing, the “Feels Like” feature was a game-changer—it accounts for humidity, not just raw temperature, which is why my house finally stopped feeling like a swamp in July.
6. Comparing Ecobee To The Competition
How does it stack up against the big names like Google Nest or Honeywell Home?
| Brand | Ease of Install | Smart Home Ecosystem | Key Weakness |
|---|---|---|---|
| Ecobee | Excellent (Includes PEK) | HomeKit, Alexa, Google | Higher upfront cost |
| Google Nest Gen 4 | Good | Google Home Focused | No HomeKit native support |
| Honeywell T9 | Moderate | Broad Compatibility | Interface feels dated |
7. Frequently Asked Questions
- Do I need a pro for ecobee thermostat installation? Honestly, if you can use a screwdriver and read a label, you can do this. 95% of users finish in under an hour.
- What if my HVAC has two R wires (Rc and Rh)? The ecobee Smart Thermostat Premium handles this! You just remove the red jumper and plug them into their respective slots.
- Does it work with Alexa? Yes, the Premium model basically is an Alexa speaker. You can ask it for the weather or to play music while you’re cooking.
8. Finishing Your Ecobee Thermostat Installation
Wrapping up your ecobee thermostat installation is about more than just clicking a plastic faceplate onto a wall. It’s about taking control of your home’s energy savings and embracing a smart home lifestyle that actually pays you back. I’ve helped dozens of friends switch from Nest or Honeywell, and the consensus is always the same: the ecobee app is more intuitive and the sensors actually solve the “bedroom is freezing” problem. If you’re still on the fence, look at my financial results again—that $388 could be in your pocket by this time next year.